Friday 27 February 2015

Hide or Show an Excel Ribbon - VBA

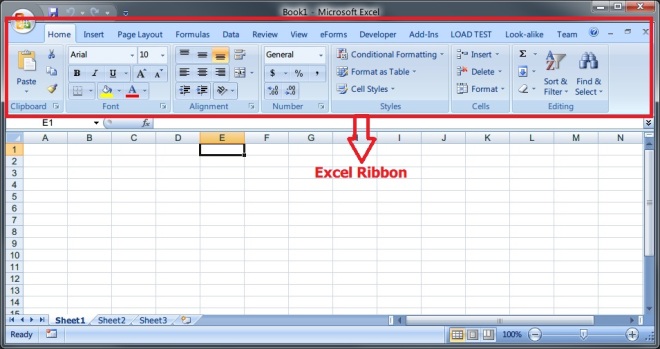
This post demonstrates how to hide or show an excel ribbon using VBA (Visual Basic for Applications). In certain cases it may not required to show an excel ribbon to the user. In such cases, hide the excel ribbon for a better user interface.

excel ribbon  
The excel ribbon will be hidden at the application level. This means in all workbooks, the excel remains hidden.
So it is important to show the excel ribbon when the workbook is deactivated or before exit from the workbook.


Follow these four steps to handle the excel ribbon -


1. Hide ribbon when user opens the excel workbook
2. Show ribbon when user deactivates the workbook
3. Hide ribbon when user activates the workbook
4. Show ribbon before exit from the excel workbook


Hide ribbon when excel workbook is open -


Add the following code in the Workbook_Open event.
ShowRibbon is the sub-routine which shows/hides the ribbon depending on the argument passed.
False - To hide the ribbon
True - To show the ribbon

Private Sub Workbook_Open()
   ShowRibbon False
End Sub


Show ribbon when workbook is deactivated -


Add the following code in the Workbook_Deactivate event.
Private Sub Workbook_Deactivate()
   ShowRibbon True
End Sub


Hide ribbon when workbook is activated -


Add the following code in the Workbook_Activate event.
Private Sub Workbook_Activate() 
   ShowRibbon False 
End Sub


Show ribbon before exit the workbook -


Add the following code in the Workbook_Close event.
Private Sub Workbook_BeforeClose(Cancel As Boolean)
   ShowRibbon True
End Sub
  And finally add this sub-routine in a module.


ShowRibbon -


'Show/Hide ribbon
Public Sub ShowRibbon( _
    ByVal Visible As Boolean _
)

 #If Not Authoring Then
    If Visible Then
        'show ribbon
        Application.ExecuteExcel4Macro "SHOW.TOOLBAR(""Ribbon"",True)"
    Else
        'hide ribbon        
        Application.ExecuteExcel4Macro "SHOW.TOOLBAR(""Ribbon"",False)"
    End If
 #End If

End Sub
 

Please share your thoughts on this post in the comments section.

Thursday 26 February 2015

Import CSV or delimited text file in Excel - VBA

This post demonstrates how to import CSV or any delimited text file in Excel using VBA code.
Each line in the text file is written into one row in a worksheet. The imported data is separated into columns in a worksheet depending on the delimited character that you specify.

But there are two limitations with the below example. The first limitation is code works with 64000 records in Excel 2003 and 1048576 records in the later versions. If the file is larger than this, modify the code to split the imported data across multiple worksheets. The second limitation is code works if the text file is in ANSI character representation which is default when you save a text file on WINDOWS.


Sample Text File -

DelimitedtextFile  
4 Rows
3 Columns
Delimited by ',' (Comma)
   

After Import -

importedtext
When the import button is clicked, the text appears in a worksheet as shown in the picture above.

Import Button Code -

Sub ImportText()
    ImportFile FName:="D:\data.txt", Sep:=","
End Sub
 
ImportFile is the sub-routine which imports the data. Change the sep:= as per your requirement. In this example comma is the separator.

ImportFile Code -

Public Sub ImportFile(FName As String, Sep As String)

Dim RowNdx As Long
Dim ColNdx As Integer
Dim TempVal As Variant
Dim WholeLine As String
Dim Pos As Integer
Dim NextPos As Integer
Dim SaveColNdx As Integer

'disable screen updates
Application.ScreenUpdating = False
'error handling
On Error GoTo EndMacro

'Importing data starts from the selected cell in a worksheet
SaveColNdx = ActiveCell.Column
RowNdx = ActiveCell.Row

'open the file in read mode
Open FName For Input Access Read As #1

'Read the file until End of Line
While Not EOF(1)
    'read line by line
    Line Input #1, WholeLine
    If Right(WholeLine, 1) <> Sep Then
        WholeLine = WholeLine & Sep
    End If
    ColNdx = SaveColNdx
    Pos = 1
    NextPos = InStr(Pos, WholeLine, Sep)
    'finding each column data
    While NextPos >= 1
        TempVal = Mid(WholeLine, Pos, NextPos - Pos)
        Cells(RowNdx, ColNdx).Value = TempVal
        Pos = NextPos + 1
        ColNdx = ColNdx + 1
        NextPos = InStr(Pos, WholeLine, Sep)
    Wend
    RowNdx = RowNdx + 1
Wend

Close #1
Exit Sub
EndMacro:
Application.ScreenUpdating = True
MsgBox Err.Description, vbOKOnly, "Error"
Close #1

End Sub
 

Summary -

This way you can import any delimited text file. Make sure that the text file is not exceeding the maximum number of rows of excel worksheet.

Please share your thoughts on this post in the comments section.

How to create a LOG file in excel and access - VBA

Welcome to Logically Proven blog.

This post demonstrates how to create a log file in excel or access using VBA (Visual Basic for Applications) code.

Consider a scenario, the application is logging the user details into the log file who are accessing the application.

Here is application may be excel or access which is located in the network location which is accessed by the multiple users.

The log data contains the application name, who are accessing the application and the application accessed date.

In the below example I am considering the excel application which logs the data into the LOG file. The application appends the data to the LOG file every time the application is accessed.

Achieving this functionality by logging the user details when the workbook is opened.

So,  the workbook open event code looks like this -

Private Sub Workbook_Open()
    LogInfo ThisWorkbook.Name & " opened by " & _
        Application.UserName & " " & Format(Date, "yyyy-mm-dd hh:mm")
End Sub

LogInfo is the sub-routine which saves the application name, user name and the access date of an application.

LogInfo sub-routine :

Sub LogInfo(LogMessage As String)

    'set path and name of the log file where you want to save
    'the log file
    Const LogFileName As String = "D:\LogData\LogFile.LOG"
    Dim FileNum As Integer
    
    FileNum = FreeFile ' next file number
    Open LogFileName For Append As #FileNum ' creates the file if it doesn't exist
    Print #FileNum, LogMessage ' write information at the end of the text file
    Close #FileNum ' close the file

End Sub

If the log file doesn't exist, the application creates automatically at the run-time. But the path should be valid and exists otherwise the application runs into error. And make sure the application is having the permissions to create and write into the log file.

This method takes one argument which is the message that you want to write into the log file.
This method appends the log message every time the application is accessed.

This way the application logs the user details who are accessing the application. You can add the same functionality in many cases for example when user modifies something in the excel or access database you can trigger the code to save the user details and what modifications did.

LOG file is very useful to analyse the application. So keep logging your application.


Please write your comments if you find anything is incorrect or do you want to share more information about the topic discussed above.


Logically Proven
Learn, Teach, Share

How to hide the password text in a textbox control in Excel - VBA

Welcome to Logically Proven blog.

This post demonstrates how to hide the password text in a text box control using Excel VBA (Visual Basic for Applications).

First design the user form as shown in the picture below -


This form contains two textbox controls - one for Username and other for password, labels and two buttons.

In the properties window (press F4 in see properties in code window) of password textbox control - change the value of PasswordChar to '*'.


This will enforce the application to show all the characters in a password textbox control as "****".
If this property value is empty, the characters are visible to the users.


If you want to display other than '*' you can change the character that you wish. Here changed to '$'.


You are restricted to enter only one character in PasswordChar property of a textbox control. Even if you try to enter more than one character, the first character will be taken into account and the remaining characters will be removed automatically from this property box.

Events:

Double-click anywhere on the form to create the form initialize event to set the default values or do you want to perform some tasks before login form open.

Private Sub UserForm_Initialize()
    
    'perform actions before opening the login form
    
End Sub


Double click on the buttons to create the respective events of the buttons.
Please find the sample codes of button events.

Sample Ok button code:

Private Sub cmdOK_Click()

'validate the controls
If txtUserName.Value = "" Or txtPassword.Value = "" Then
    MsgBox "Please enter valid username and password"
    Exit Sub
End If
    
    'do your work

'close the form
Unload frmLogin

End Sub

Sample Cancel button code: To close the form

Private Sub cmdClose_Click()

'close the form
Unload frmLogin

End Sub


Please write your comments if you find anything is incorrect or do you want to share more information about the topic discussed above.


Logically Proven
Learn, Teach, Share

Wildcard pattern matching in C

Welcome to Logically Proven blog.

This post demonstrates how to match a wildcard pattern against a particular string in C programming.

To achieve this we are using the function fnmatch which is in-built declared in the header fnmatch.h

Syntax:

int fnmatch (const char *pattern, const char *string, int flags)

This function tests whether the string is matching against the given pattern. This function returns zero if the string match with the given pattern else the function returns non-zero value FNM_NOMATCH.

The both  string and pattern are strings.

The third argument flags is a combination of flag bits that alter the details of matching which means you can change the way of matching the string by passing the flag bits.

The following are the available flags -

FNM_FILE_NAME

This flag treats the '/' character specially, for matching file names. If this flag is set, wildcard constructs in pattern cannot match '/' in string. Thus, the only way to match '/' is with an explicit '/' in pattern.

FNM_PERIOD

This flag treats the '.' character specially if it appears at the beginning of string. If this flag is set, wildcard constructs in pattern cannot match ‘.’ as the first character of string.

FNM_NOESCAPE

Don’t treat the ‘\’ character specially in patterns. Normally, ‘\’ quotes the following character, turning off its special meaning (if any) so that it matches only itself. When quoting is enabled, the pattern ‘\?’ matches only the string ‘?’, because the question mark in the pattern acts like an ordinary character.

If you use FNM_NOESCAPE, then ‘\’ is an ordinary character. 

FNM_LEADING_DIR

Ignore a trailing sequence of characters starting with a ‘/’ in string; that is to say, test whether string starts with a directory name that pattern matches.

If this flag is set, either ‘foo*’ or ‘foobar’ as a pattern would match the string ‘foobar/frobozz’.

FNM_CASEFOLD

Ignore case sensitive in comparing string to pattern.

FNM_EXTMATCH

Recognize beside the normal patterns also the extended patterns introduced in ksh. The patterns are written in the form explained in the following table where pattern-list is a | separated list of patterns.

?(pattern-list)
          matches any single character in the pattern-list

*(pattern-list)
          matches everything in the pattern-list

+(pattern-list)
          matches one or more occurrences of  any of the patterns in the pattern-list

@(pattern-list)
          matches exactly one occurrence of the patterns in the pattern-list

!(pattern-list)
          matches if input string is not matches the patter-list

[seq](pattern-list)
          matches the given sequence of the patterns in the pattern-list

[!seq](pattern-list)
          matches if input string is not matches the given sequence of the patterns in the pattern-list


Please write your comments if you find anything is incorrect or do you want to share more information about the topic discussed above.


Logically Proven
Learn, Teach, Share


Ref: GNU C Library

Different modes of rounding float values in C and C++

Welcome to Logically Proven blog.

This post demonstrates different modes of rounding float values in C/C++ programming.

Floating-point calculations are carried out internally with extra precision, and then rounded to fit into the destination type.

ROUNDING MODES:

IEEE 754 defines the following four possible rounding modes:

1. Round to nearest (FE_TONEAREST)
2. Round toward plus infinity (FE_UPWARD)
3. Round toward minus infinity (FE_DOWNWARD)
4. Round toward zero (FE_TOWARDZERO)

RETURN VALUES:

You can decide the following destination types when rounding the float values -

These functions are available in the header #include <math.h>
So don't forget to include this header file while working with rounding the float values.

rint() - this function returns the integral value depending on rounding mode.

Syntax:

//x is the float value
double rint(double x)

If x is +/- infinity, rint() returns x.
If x is NaN, NaN is returned.

rintf() - this function returns the single-precision value depending on rounding mode.

Syntax:

//x is the float value
float rint(float x)

#include <fenv.h>

All these rounding modes are defined in the header file #include <fenv.h> as shown below -

/* FPU control word rounding flags */
#define FE_TONEAREST 0x0000   //decimal value: 0
#define FE_DOWNWARD 0x0400   //decimal value: 1024
#define FE_UPWARD 0x0800   //decimal value: 2048
#define FE_TOWARDZERO 0x0c00   //decimal value: 3072

The macro values may change depending on compiler.
The decimal representation of hex values are useful while setting the rounding mode. This is explained in the later section.

Now we look into each rounding mode.

Round to nearest (FE_TONEAREST):

This is the default mode. In this mode results are rounded to the nearest representable value. If the result is midway between two representable values, the even representable is chosen. Even here means the lowest-order bit is zero. This rounding mode prevents statistical bias and guarantees numeric stability.

Round toward plus infinity (FE_UPWARD):

All results are rounded to the smallest representable value which is greater than the result. In other words the values are rounded towards +infinity.

Round toward minus infinity (FE_DOWNWARD):

All results are rounded to the largest representable value which is less than the result. In other words the values are rounded towards -infinity.

Round toward zero (FE_TOWARDZERO):

All results are rounded to the largest representable value which is less than the result. In other words, if the result is negative it is rounded up; if it is positive, it is rounded down.

Important note - If the result is too small to be represented, it is rounded to zero. However, the sign of the result is preserved.

E.g. FE_TOWARDZERO(-0.22) returns -0.

This is because the negative zero can also result from some operations on infinity, such as 4/-infinity.

Get and Set Rounding Mode:

int fegetround(void) - This function is used to to return the currently selected rounding mode.

int fesetround(int round) -

This function is used to set the one of the rounding modes. The argument 'round' to this function is either an decimal representation or macro name (e.g. FE_UPWARD) of rounding mode. This function returns non-zero value if it fails to set rounding mode else zero if success.

Note - Avoid changing the rounding mode if possible. It can be expensive operation which leads to run the code slower than expected. For more details see your compiler documentation.

C Example:

#include <stdio.h>
#include <stdlib.h>
#include <fenv.h>
#include <math.h>

int main()
{
    float fValue;
    fValue = 10.22;
    
    //by default FE_TONEAREST
    printf("\nFE_TONEAREST:%f\n",rintf(fValue));

    //set to FE_UPWARD, returns zero if success
    //set using macro name
    printf("Set to FE_UPWARD: %d\n",fesetround(FE_UPWARD));
    printf("Currently the rounding mode is :%d\n",fegetround());
    printf("FE_TOUPWARD(10.22):%f\n",rintf(fValue));

    //set to FE_DOWNWARD, returns zero if success
    //FE_DOWNWARD integral representation is 1024
    //set using integral representation of macro name
    printf("Set to FE_DOWNWARD: %d\n",fesetround(1024));
    printf("Currently the rounding mode is :%d\n",fegetround());
    printf("FE_DOWNUPWARD(10.22):%f\n",rintf(fValue));

    //set to FE_TOWARDZERO, returns zero if success
    printf("Set to FE_TOWARD: %d\n",fesetround(FE_TOWARDZERO));
    printf("Currently the rounding mode is :%d\n",fegetround());
    printf("FE_TOWARDZERO(-0.22):%f\n",rintf(-0.22));

    printf("Currently the rounding mode is :%d\n",fegetround());
    printf("FE_TOWARDZERO(1.22):%f\n",rintf(1.52));

    return 0;
}

/* output:
FE_TONEAREST:10.000000
Set to FE_UPWARD: 0
Currently the rounding mode is :2048
FE_TOUPWARD(10.22):11.000000
Set to FE_DOWNWARD: 0
Currently the rounding mode is :1024
FE_DOWNUPWARD(10.22):10.000000
Set to FE_TOWARD: 0
Currently the rounding mode is :3072
FE_TOWARDZERO(-0.22):-0.000000
Currently the rounding mode is :3072
FE_TOWARDZERO(1.22):1.000000
*/

C++ Example: Rounding is guaranteed only if #pragma STDC FENV_ACCESS ON is set.

Include header files fenv.h and math.h if you are using older versions of C++. C++11 version and later supports cfenv.h and cmath.h header files.

#include <iostream>
#include <string>
#include <cfenv>
#include <cmath>
int main()
{
#pragma STDC FENV_ACCESS ON
    std::fesetround(FE_DOWNWARD);
    std::cout << "rounding down: \n"              
              << "  rintf(2.8) = " << std::rint(2.8) << "\n\n";
}

/*output:
rounding down:
   rint(2.8) = 2
*/

Please write your comments if you find anything is incorrect or do you want to share more information about the topic discussed above.

Logically Proven
Learn, Teach, Share

Wednesday 25 February 2015

Sleep function in C

Welcome to Logically Proven blog.

This post demonstrates how to make your program wait for a period of time.

It is required to wait out program for a little span of time before executing some statements. For example in case waiting for Input/Output signals.

The function sleep gives a simple way to make the program wait for a short interval. If the program doesn't use signals, then you can use sleep function to wait reliably the specified interval.

Otherwise, sleep can return sooner if a signal arrives; if you want to wait for a given interval regardless of signals, use sleep.

The sleep function is declared in unistd.h

Syntax:

unsigned int sleep (unsigned int seconds)

The sleep function waits for seconds or until a signal is delivered, whichever happens first.

The sleep function returns either requested interval is over, it returns a value zero else because of deliver of a signal, it returns a non-zero (remaining time) in the sleep interval.

You can call sleep function again if the sleep returns a non zero value as long as signals arrive infrequently. If the signals are arriving in rapid - it is difficult to decide the wait time whether to shorten or lengthen the wait time.

On some systems, sleep can do strange things if your program uses SIGALRM explicitly.

On GNU systems, it is safe to use sleep function and SIGALRM in the same program, because sleep doesn't work by means of SIGALRM.

Example:

#include <time.h>
#include <stdio.h>
#include<windows.h> 
#include <conio.h>
 
int main()
{
 printf("before sleep() function\n");
 Sleep(10); //10 seconds
 printf("after 10 seconds");
 getch();
 return 0;
}

This program waits for 10 seconds before printing "after 10 seconds".


Please write your comments if you find anything is incorrect or do you want to share more information about the topic discussed above.


Logically Proven
Learn, Teach, Share

Ref: GNU C Library

Extract file name from a path in Excel using formula and VBA

Welcome to Logically Proven blog.

This post demonstrates how to extract a file name from a path using Excel and VBA.

The following are the ways to extract a file name from a path. You can use any one of these methods to extract a file name.

1. Using Excel Formula
2. Using VBA code
3. Using File System Object (VBA)

Using Excel Formula:

=MID(A1,FIND(CHAR(1),SUBSTITUTE(A1,"\",CHAR(1),LEN(A1)-LEN(SUBSTITUTE(A1,"\",""))))+1,LEN(A1))

Consider range  A1 contains a path "C:\Test\file.txt".
Output of this formula is "file.txt"

Using VBA code:

Sub extractfilename()

Dim sFullPath As String
Dim sFullFilename As StringUsin
Dim sFilename As String

    sFullPath = Sheet1.Range("A1").Value
    If sFullPath = "" Then
        Exit Sub
    End If
    sFullFilename = Right(sFullPath, Len(sFullPath) - InStrRev(sFullPath, "\"))
    sFilename = Left(sFullFilename, (InStr(sFullFilename, ".") - 1))
    Sheet1.Range("B1").Value = sFilename

End Sub

3. Using File System Object (VBA)

One more way to get the file name is using file system object.

If you want to use file system object, first we have to add reference to the library "Microsoft Scripting Runtime".

To add, in code window, Select Tools -> Select References -> Search for the library in the list -> check the button "Microsoft Scripting Runtime" -> click OK.

Then try the following code to extract the file name from a path. Make sure the path is valid else you will receive an error message. File system objects checks if path exists or not. You can add a condition to check if the files exists or not before extracting using fso.FileExists(path) returns a boolean.


Sub ExtractFileName()

     Dim fso as new FileSystemObject
     Dim fileName As String

     fileName = fso.GetFileName("C:\Test\file.txt")
     set fso = Nothing

End Sub

These are some ways to extract file name from a path.


Please write your comments if you find anything is incorrect or do you want to share more information about the topic discussed above.


Logically Proven
Learn, Teach, Share

Update image of an image control dynamically in Excel - VBA

Welcome to Logically Proven blog.

This post demonstrates how to update image of an image control in Excel with VBA (Visual Basic for Applications).

It is required to update the image of an image control in Excel without manually loading the image. This post teaches you how to do this dynamically with the help of VBA code.

To add an image control in a worksheet:

In Excel Ribbon select Developer tab -> Click on Insert ->  In ActiveX controls -> Select Image Control.

If you don't see the Developers tab, please check this link which explains how to add-
http://logicallyproven.blogspot.de/2015/02/worksheet-display-name-vs-code-name-in.html

You can update the image with the properties of previous image or you can set the new properties of image. The properties include top, bottom, height and width of an image.

Important note - Please do not debug the code. If you try to debug; application raises an error. This is because we are deleting one of the objects in a worksheet. (error raises at the line where the image control is deleted)

The following is the code to update the image of an image control:

 1
 2
 3
 4
 5
 6
 7
 8
 9
10
11
12
13
14
15
16
17
18
19
20
21
22
23
24
25
26
27
28
29
30
31
Sub UpdateReportImage(strImageName, strImagePath)
    
    Dim shp As Shape
    Dim top, length, height, width As Single
    
    On Error GoTo err_handler
    
    Set shp = Report.Shapes(strImageName)
    'Capture properties of exisitng picture such as location and size
    With shp
        top = .top
        length = .Left
        height = .height
        width = .width
    End With
    
    Report.Shapes(strImageName).Delete

    Set shp = Report.Shapes.AddPicture(strImagePath, msoFalse, msoTrue, length, top, width, height)
    shp.ScaleHeight Factor:=1, RelativeToOriginalSize:=msoTrue
    shp.ScaleWidth Factor:=1, RelativeToOriginalSize:=msoTrue
    shp.Name = strImageName
    Set shp = Nothing
    
    MsgBox "Image Updated", vbOKOnly, "Updated"
    Exit Sub

err_handler:
    MsgBox Err.Description, vbOKOnly, "Error"
    
End Sub

Line 8: Report is the worksheet name and initializing the shp object to the existing image control. If the application fail to find the given image, you will receive an error message.

From line 10 to 15: Capturing the properties of an existing image. In case if you want to set the new properties of an image, edit the values of top, length, height, width.

Line 17: After capturing the properties, deleting the shape which is not required.

Line 19: To add a image control in the worksheet named "Report" with the captured properties with the given name. AddPicture requires following inputs.

AddPicture(Filename, LinkToFile , SaveWithDocument, Left, Top, width, Height)

Line 20 & 21: Set the original height and width relative to the new image. Comment these lines if you don't want to re-size the image with respect to new image.

This way you can change the image control dynamically with the help of VBA.


Please write your comments if you find anything is incorrect or do you want to share more information about the topic discussed above.


Logically Proven
Learn, Teach, Share

Generate PDF document from Excel - VBA

Welcome to Logically Proven blog.

This post demonstrates how to generate a PDF document from Excel using VBA (Visual Basic for Applications).

Sometimes it is required to generate a PDF document from the Excel workbook or worksheet. This post gives you a basic idea how to generate the PDF document from a workbook or a worksheet.

We have to follow these two points in  order to generate a PDF document.

1. Page set up
2. Export as PDF

Page set up:

It is very important to set up the page of a worksheet before exporting as a PDF document.
The following line will set the paper size of a worksheet to A4.

    'set worksheet paper size to A4
    'Report is the worksheet name
    Report.PageSetup.PaperSize = xlPaperA4

If you want to see the available paper sizes please follow this link -
https://msdn.microsoft.com/en-us/library/office/ff834612.aspx

If you want to set the paper size of a complete workbook iterate through each worksheet in a workbook.

Export as PDF:

The second step is exporting the worksheet/workbook as PDF document. The following example exports the "Report" worksheet to PDF document.


 1
 2
 3
 4
 5
 6
 7
 8
 9
10
11
12
13
14
15
16
17
18
19
20
21
22
23
24
25
26
27
28
29
30
31
32
33
34
35
36
37
38
39
40
41
42
43
Sub GeneratePDF()
    
    'Declare variables
    Dim strFileName As String
    Dim ReportNum As Long
    Dim strPath As String
    Dim strFilePath As String
    
    'error handling
    On Error GoTo err_handler
            
    'Set report name
    strFileName = "ReportName"
    
    'Save the pdf document on desktop
    'set the path if you want to save the pdf document in a different folder
    strPath = CreateObject("WScript.Shell").SpecialFolders("Desktop") & Application.PathSeparator
        
    'full path
    strFilePath = strPath & strFileName
    
    'set worksheet paper size to A4
    'Report is the worksheet name
    Report.PageSetup.PaperSize = xlPaperA4
    
    'Replace Report with ThisWorkbook if you want to export the complete workbook
    
    'Export the sheet Report in pdf
    Report.ExportAsFixedFormat _
        Type:=xlTypePDF, _
        Filename:=strFilePath, _
        Quality:=xlQualityStandard, _
        IncludeDocProperties:=True, _
        IgnorePrintAreas:=False, _
        OpenAfterPublish:=False
       
    Exit Sub
            
    
err_handler:
    MsgBox Err.Description, vbOKOnly, "Error"
           
End Sub

In line 17: we are getting the user's desktop path. This line works only if have a reference to the "Microsoft Shell Controls and Automation" library. Please add a reference to this library.

For adding, in code window
Select Tools -> Select References -> Search for the library in the list -> Check the button "Microsoft Shell Controls and Automation" -> Press OK.

In line 29: This code exports only one worksheet. If you want to export the entire workbook, replace the Report in line 29 with ThisWorkbook.

In line 30: We are defining the type of document to export. In our case PDF.

In line 31: Mention full path. you can give directly the file path including file name in double-quotes (e.g. "C:\ReportName").

In line 32: Mention the quality of the document. (e.g. images) The other available quality is xlQualityMinimum if you reduce the memory size of the exported document (e.g. if your report has more images).

In line 35: If you change the value to "True", the PDF document opens immediately after generating.

This way you can export the workbook/worksheet to PDF.


Please write your comments if you find anything is incorrect or do you want to share more information about the topic discussed above.


Logically Proven
Learn, Teach, Share

Difference between worksheet display names and code names in Excel (VBA)

Welcome to Logically Proven blog.

This post demonstrates the difference between  worksheet code names and worksheet display name. And also explains which name is better to use in the VBA (Visual Basic for Applications) code.

In an excel workbook, every worksheet has two names - display name and code name.

Display name:

Display name is the name visible to every user and every user is allowed to edit the display name of the worksheet by default (if workbook is not protected).


Code name:

Code name is the another name of a worksheet which is not visible to every user. The code name is visible only in the code window of workbook application. Press Alt+F11 to view the code names of worksheets in the code window.

The another way to open the code window is go to Developer tab in the excel ribbon, click on Visual Basic as shown in the picture below.


If you don't see the developer tab, follow this (Microsoft Excel 2010)- select excel file menu (office symbol on the top left) -> select Excel Options -> Select Popular Section -> check the button "Show Developer tab in the Ribbon" and press OK as shown in the picture below -


Once you press the Alt+F11, the following code window opens where you will find the code names of the worksheets.


To view the properties window press F4 or in the code window select View menu and click on Properties Window.

Then select any one of the sheets, you get all the properties of the sheet and you can edit the code name of the sheet in the (Name) column. This name is only visible in the code window but not to the every user.

Press Alt+F11 again to switch between code window and excel workbook.

Understand why it is important to use code names in your code?

Consider you are writing VBA code to perform some tasks with the worksheets in a workbook.
In your code you are referring to a worksheet with a display name as shown below. Consider the code name and display name of worksheet is Sheet1.


Sub test()
    
    ThisWorkbook.Sheets("Sheet1").Range("A1").Value = "Hello,"
    ThisWorkbook.Sheets("Sheet1").Range("B1").Value = "this"
    ThisWorkbook.Sheets("Sheet1").Range("C1").Value = "is a"
    ThisWorkbook.Sheets("Sheet1").Range("D1").Value = "test code."
    
End Sub

This code works very well until unless user is not changing the display name of a worksheet.

What happens if user changes the display name of a worksheet. You will get the following error message because the application is unable to find the display name of a worksheet. (considering without error handling for better explanation)


In this case, it is an extra work to search all your code and replace the display names of the sheets. This is a bad solution to replace because if user changes again the display name. Thus it is never ending process.

The permanent solution is not to use display names of a worksheet in the code. The optimal solution is to use code names or getting the index of a worksheet by searching the code names as shown below.

Using code names directly in the code:

Sub test()
    
    Sheet1.Range("A1").Value = "Hello,"
    Sheet1.Range("B1").Value = "this"
    Sheet1.Range("C1").Value = "is a"
    Sheet1.Range("D1").Value = "test code."
    
End Sub

This code works fine even the user renames the display name of a worksheet. But it is better not to refer the worksheet so many times. Unnecessarily the memory size of application grows. If you are using just one or two times in method/function it is okay. If you want to refer more times initialize an worksheet object as shown below.

Using index of a worksheet by searching code names:

Sub test()
    
    'declaring the variable of type worksheet
    Dim wksInput As Worksheet
         
    'initialize the object
    Set wksInput = ThisWorkbook.Sheets(GetWorksheetIndex("Sheet1"))
    
    'with keyword can be used as below
    With wksInput
        .Range("A1").Value = "Hello,"
        .Range("B1").Value = "this"
        .Range("C1").Value = "is a"
        .Range("D1").Value = "test code."
    End With
  
  'release the object before exit
  Set wksInput = Nothing
    
End Sub

Here we are getting the index of a worksheet by searching the code name of a worksheet "GetWorksheetIndex". And we are using worksheet object wksInput for speeding the application. Never forget to release the worksheet object if you don't require any more to speed up the application.

GetWorksheetIndex function:


Function GetWorksheetIndex(strSheetName As String) As Integer

    Dim intCounter As Integer
    Dim intIndex As Integer
    Dim wkb As Workbook

    On Error GoTo err_handler
    Set wkb = ThisWorkbook

    intIndex = 0
    
      'iterate through all worksheets in a workbook
       For intCounter = 1 To wkb.Worksheets.Count
          If UCase(wkb.Worksheets(intCounter).CodeName) = UCase(strSheetName) Then
             intIndex = intCounter
             Exit For
          End If
       Next intCounter

    GetWorksheetIndex = intIndex

endthis:
    Set wkb = Nothing
    Exit Function

err_handler:
    MsgBox Err.Description, vbOKOnly, "Error in GetWorksheetIndex"
    Resume endthis
End Function

Even user changes the display name of a worksheet, we never run into errors because we are using code name of a worksheet. In case if you want to change the code name of a worksheet, it is required to change the code names in the code else you will run into runtime errors. Please use error handlers for the smooth running of your application as shown in the GetWorksheetIndex function.


Please write your comments if you find anything is incorrect or do you want to share more information about the topic discussed above.


Logically Proven
Learn, Teach, Share

Tuesday 24 February 2015

Export Excel Worksheet(s) to a new workbook in Excel - VBA

Welcome to Logically Proven blog.

This post demonstrates how to export a particular sheet or all worksheets to a new workbook using excel VBA (Visual Basic for Applications).

In certain situations, it is required to export a current workbook data to a new workbook or do you want to save a backup of some worksheets of a workbook. In either of these cases, you can use the following VBA code to accomplish this task.

 1
 2
 3
 4
 5
 6
 7
 8
 9
10
11
12
13
14
15
16
Sub CreateCopy() 
    Dim w As Worksheet, nb As Workbook, s As String 
    For Each w In ThisWorkbook.Worksheets 
        If w.Name <> "Approvals" And w.Name <> "Calcs" Then 
            If nb Is Nothing Then 
                w.Copy 'creates new workbook and copies sheet to it
                Set nb = ActiveWorkbook 
            Else 
                w.Copy after:=nb.Sheets(nb.Sheets.Count) 
            End If 
        End If 
    Next w 
    s = ThisWorkbook.FullName 
    s = Left(s, Len(s) - 4) & "2.xls" 
    nb.SaveAs s 
End Sub 

In this example,

nb is the new workbook where we are exporting the worksheets.

In line 3: We are iterating through all the available worksheets in the currently working workbook.

In line 4: In case if you don't want to export some sheets, exclude those sheets. In this example I am excluding the sheets "Approvals" and "Calcs". If you want to export all the worksheets, remove this condition.

In line 5,6: If new workbook is not created, it creates a new workbook and copies worksheet.

In line 9: Copies the worksheet at the end (after last sheet) in the new workbook. You can modify this line if you want to change the order of the worksheets in the new workbook.

In line 13: Getting the name of the current workbook including the path. (.FullName fetches the name of the workbook as well as the path of the workbook)

In line 14: Setting the new workbook name. Consider the currently working workbook name is "ExportData.xlsm", this line sets the new workbook name as "ExportData2.xls".

In line 15: Saving the workbook.

Please write your comments if you find anything is incorrect or do you want to share more information about the topic discussed above.


Logically Proven
Learn, Teach, Share

Dictionary object in Excel - VBA

Welcome to Logically Proven blog.

This post demonstrates dictionary object in Excel VBA (Visual Basic for Applications).

A dictionary class is a data structure that represents a collection of keys and values pair. The key is unique (identical) in a key-value pair and it can have at most one value in the dictionary, but a value can be associated with many different keys.

A dictionary class contains following members -

Add(key, item) - add a new key and item to the dictionary.
CompareMode - set or get the string comparison method.
Count ()- get the number of items in the dictionary. it is read-only.
Exists(Key) -  determine if a given key is in the dictionary.
Item(Key) - get or set the item for a given key.
Items() - get an array containing all items in the dictionary.
Key(Key) - change a key to a different key.
Keys() - get an array containing all keys in the dictionary.
Remove(Key) - remove a given key from the dictionary.
RemoveAll() -  remove all information from the dictionary.

The dictionary is available in the library Microsoft Scripting Runtime. Add a reference to the "Microsoft Scripting Runtime" library as shown below -

In the code window (Press Alt+F11 to switch between windows) -> Select Tools -> Select References -> From the list find "Microsoft Scripting Runtime" -> check it and Press "Ok".


The following example illustrates the dictionary class and the members of dictionary.

'Mandatory to declare variables explicitly
Option Explicit

'declaring global variable
Dim dict As Dictionary

Sub DictionaryExample()
Dim keyArray, itemArray, element

'Initilalize a dictionary object
Set dict = New Dictionary

'dictionary object
With dict
   'set compare mode
   .CompareMode = BinaryCompare
   
   'Other compare modes
   '.CompareMode = DatabaseCompare
   '.CompareMode = TextCompare
   
   'add item using named arguments
   .Add Key:="mike", Item:=22
    'keys are case-sensitive
    'Mike and mike are different
   '.Add Key:="Mike", Item:=22 'this line gives compiler error
   'add item without named arguments
   .Add "joe", 33
            
   'case sensitivity and Exists method
   'does MIKE exist?
   Debug.Print "MIKE exists = " & .Exists("MIKE")
   'change key value
   .Key("mike") = "MIKE"
   'does MIKE exist?
   Debug.Print "MIKE exists = " & .Exists("MIKE")

   'extract keys into variant array
   Debug.Print "Array of Keys"
   keyArray = .Keys
   For Each element In keyArray
      Debug.Print element
   Next

   'extract items into variant array
   Debug.Print "Array of Items"
   itemArray = .Items
   For Each element In itemArray
      Debug.Print element
   Next
    
    'Items in dictionary
    Debug.Print dict.Count & " Items in Dictionary"
   'empty the dictionary
   .RemoveAll
   Debug.Print dict.Count & " Items in Dictionary"

End With
//release the dictionary object
Set dict = Nothing
End Sub


'output:
'MIKE Exists = False
'MIKE Exists = True
'Array of Keys
'MIKE
'joe
'Array of Items
'22
'33
'2 Items in Dictionary
'0 Items in Dictionary

There are three comparison modes available. By default the comparison mode is BinaryCompare. The other two are DatabaseCompare and TextCompare.

To understand the difference between these comparison please follow this link - https://msdn.microsoft.com/en-us/library/8t3khw5f.aspx

Binary comparison is case-sensitive. So 'Mike' and 'mike' are different in the given example. If you try to add the same key twice, you will encounter the following error message.


Please write your comments if you find anything is incorrect or do you want to share more information about the topic discussed above.


Logically Proven
Learn, Teach, Share

 
biz.