Use the following code to find the last data row in a worksheet.
Monday, 12 October 2015
FIND THE LAST ROW IN A WORKSHEET USING VBA
Use the following code to find the last data row in a worksheet.
FIND THE LAST COLUMN IN A WORKSHEET USING VBA
Use the following code to find the last data column in a worksheet.
IMPORT CSV OR ANY DELIMITED TEXT FILE WITH UNICODE ENCODINGS IN EXCEL USING VBA
This post demonstrates how to import CSV or any delimited text file with Unicode encoded in Excel using VBA code.
By default, text files are encoded in ANSI representation on WINDOWS platform.When you try to import the ANSI encoded text files into excel using VBA, you may not see problems with the data appearing in the excel worksheet. But there is a problem when importing a text file other than ANSI encoding.
The Possible Encodings of a Text File –
The following are the available character encoding representations of a text file on WINDOWS platform.
- ANSI (default encoding representation)
- Unicode
- Unicode big endian
- UTF-8

1. Open a text file with notepad editor.
2. Select File menu and click on Save As
3. Look at the Encoding at the bottom, which tells you the current encoding of a text file.
4. Click on Encoding drop-down list, to see the supported encoding representations of a text file on your machine.
What are these encodings?
What happens when Unicode encoded text is imported into Excel –
 4 Rows
3 Columns
Delimited by ‘,‘ (Comma)
The following is the output screen when each encoded text file is imported into Excel. When the
import button is clicked, the data will be imported from the active cell in a worksheet.
If you look at the output screen, the every first cell of each encoding contains a garbage value.
Reason –
Representation of BOM by encoding –
| Encoding | Representation (hexadecimal) | Representation (decimal) | Bytes as CP1252characters |
|---|---|---|---|
| UTF-8[t 1] | EF BB BF | 239 187 191 |  |
| UTF-16(BE) | FE FF | 254 255 | þÿ |
| UTF-16(LE) | FF FE | 255 254 | ÿþ |
How to Resolve –
Import Button Code –
1 2 3 | Sub DoTheImport() ImportTextFile FName:="D:\data.txt", Sep:="," End Sub |
ImportFile is the sub-routine which imports the data. Change the sep:= as per your requirement. In this example comma is the separator.ImportFile Code –
1 2 3 4 5 6 7 8 9 10 11 12 13 14 15 16 17 18 19 20 21 22 23 24 25 26 27 28 29 30 31 32 33 34 35 36 37 38 39 40 41 42 43 44 45 46 47 48 49 50 51 52 53 54 55 56 | Public Sub ImportTextFile(FName As String, Sep As String) Dim RowNdx As Long Dim ColNdx As Integer Dim TempVal As Variant Dim WholeLine As String Dim Pos As Integer Dim NextPos As Integer Dim SaveColNdx As Integer 'disable screen updates Application.ScreenUpdating = False 'error handling On Error GoTo EndMacro 'Importing data starts from the selected cell in a worksheet SaveColNdx = ActiveCell.Column RowNdx = ActiveCell.Row 'open the file in read mode Open FName For Input Access Read As #1 'Read the file until End of Line While Not EOF(1) 'read line by line Line Input #1, WholeLine WholeLine = Replace(WholeLine, "", "", vbTextCompare) 'UTF-8 WholeLine = Replace(WholeLine, "ÿþ", "", vbTextCompare) 'UTF-16 Unicode little endian WholeLine = Replace(WholeLine, "þÿ", "", vbTextCompare) 'UTF-16 Unicode big endian 'checking if the line is empty If Right(WholeLine, 1) <> Sep Then WholeLine = WholeLine & Sep End If ColNdx = SaveColNdx Pos = 1 NextPos = InStr(Pos, WholeLine, Sep) 'finding each column data While NextPos >= 1 TempVal = Mid(WholeLine, Pos, NextPos - Pos) Cells(RowNdx, ColNdx).Value = TempVal Pos = NextPos + 1 ColNdx = ColNdx + 1 NextPos = InStr(Pos, WholeLine, Sep) Wend RowNdx = RowNdx + 1 Wend Close #1 Exit Sub EndMacro: Application.ScreenUpdating = True MsgBox Err.Description, vbOKOnly, "Error" Close #1 End Sub |
Summary –
Please share your thoughts on this post in the comments section.
Tuesday, 10 March 2015
Difference between print(null.toString()) and print(null)
This post demonstrates difference between
Look at the java bytecode of the program.
In code column, line #8 shows the bytecode representation of calling
Consider the bytecode, in code column line #18 shows the bytecode representation of calling
The documentation tells that the null reference is handled if null reference is passed. If argument is
Please share your thoughts on this post in the comments section.
print(null.tostring()) and print(null) in Java programming.
The difference isConsider the below sample code to understand the concept clearly.print(null.tostring())throws null pointer exception butprint(null)doesn't. Why?
public class NPETest {
    public static void main(String[] args) {
        Object obj1 = null;
        Object obj2 = null;
        System.out.print(obj1.toString()); //throws Null Pointer Exception
        System.out.print(obj2); // prints null
    }
}
The statement System.out.print(obj1.toString()) causes following runtime exception.
Exception in thread "main" java.lang.NullPointerException
at com.org.s20150310072124635.NPETest.main(NPETest.java:5)
The statement System.out.println(obj2) runs fine and prints a text "null".
Why an exception is caused?
Look at the java bytecode of the program.
> javap -classpath target\test-classes -c NPETest

Compiled from "NPETest.java"
public class NPETest extends java.lang.Object{
public NPETest();
  Code:
   0:   aload_0
   1:   invokespecial   #8; //Method java/lang/Object."<init>":()V
   4:   return

public static void main(java.lang.String[]);
  Code:
   0:   aconst_null
   1:   astore_1
   2:   aconst_null
   3:   astore_2
   4:   getstatic       #17; //Field java/lang/System.out:Ljava/io/PrintStream;
   7:   aload_1
   8:   invokevirtual   #23; //Method java/lang/Object.toString:()Ljava/lang/String;
   11:  invokevirtual   #27; //Method java/io/PrintStream.print:(Ljava/lang/String;)V
   14:  getstatic       #17; //Field java/lang/System.out:Ljava/io/PrintStream;
   17:  aload_2
   18:  invokevirtual   #33; //Method java/io/PrintStream.print:(Ljava/lang/Object;)V
   21:  return

}
In code column, line #8 shows the bytecode representation of calling
obj1.toString(). Here obj1 is null and so any attempt on a method invocation on null results in a NullPointerException.
Why print(null) works fine?
Consider the bytecode, in code column line #18 shows the bytecode representation of calling
print(obj2). Here object is passed as a parameter to the PrintStream.print() method. According to the Java documentation, the source code will tell you that why this does not result in NullPointerException.public void print(Object obj) { write(String.valueOf(obj)); } public static String valueOf(Object obj) { return (obj == null) ? "null" : obj.toString(); }
The documentation tells that the null reference is handled if null reference is passed. If argument is
null, then a string equal to "null"; otherwise, the value of obj.toString() is returned. So this statement does not result in NullPointerException.
Summary -
print(null.tostring()) causes Null Pointer Exception.
print(null) prints text "null".
Please share your thoughts on this post in the comments section.
Monday, 9 March 2015
System.out.println(null) ?
This post demonstrates why
When you run the statement
Because there are (at least) two print methods that can accept null (one more is println(object)).
The duty of compiler is to type-check the parameters to the method call. So because of ambiguity, the compiler error.
you will receive the following runtime exception.
According to Java documentation,
According to Java documentation,
If argument is null, then a string equal to "null"; otherwise, the value of
Please share your thoughts on this post in the comments section.
System.out.println(null) causes a compilation error and how to resolve.When you run the statement
System.out.println(null), you will see the following compilation error.
reference to println is ambiguous,
both method println(char[]) in java.io.PrintStream and
method println(java.lang.String) in java.io.PrintStream match
Because there are (at least) two print methods that can accept null (one more is println(object)).
Since null can fit in both, the compiler doesn't know which method to use, leading to a compiler error.The compiler tries to find the most specific version of an overloaded method. Both char[] and String are sub types of Object, so that's why the third method is not considered.
Why compile-time error?
The duty of compiler is to type-check the parameters to the method call. So because of ambiguity, the compiler error.
Possible Method over-loaders that accepts null -
1. public void println(String x) {}
2. public void println(char[] x) {}
3. public void println(Object x) {}
How to resolve?
If you replace the statement System.out.println(null); with any one of the following statements, the code works.
System.out.println((String)null);
System.out.println((Object)null);
Why not System.out.println((char [])null)?
you will receive the following runtime exception.
Exception in thread "main" java.lang.NullPointerException
at java.io.Writer.write(Writer.java:110)
at java.io.PrintStream.write(PrintStream.java:453)
at java.io.PrintStream.print(PrintStream.java:603)
at java.io.PrintStream.println(PrintStream.java:742)
at com.org.s20150309105710441.MyClass.main(MyClass.java:5)
Why Null Pointer Exception?
According to Java documentation,
char will not handle null pointer which leads to null pointer exception. Thus println(char[] s) prints the array of characters when s is not a null pointer.
Why println(String s) and println(Object obj) works?
According to Java documentation,
both String and Object handles null pointer.
println(String s) - If the argument is null then the string "null" is printed. Otherwise, the string's characters are converted into bytes according to the platform's default character encoding.
println(Object obj) - The string produced by the String.valueOf(Object) method is translated into bytes according to the platform's default character encoding.
valueOf(Object obj) -
public static String valueOf(Object obj) {
    return (obj == null) ? "null" : obj.toString();
}
If argument is null, then a string equal to "null"; otherwise, the value of
obj.toString() is returned.
Summary -
Thus char always leads to a null pointer exception when it encounters a null pointer reference.
Try -
public class PrintNull {
 public static void main(String[] args) {
  Object o = null;
  String s = null;
  char[] a = null;

  //System.out.println(null); // Compilation error
  System.out.println(o); // Prints "null"
  System.out.println(s); // Prints "null"
  System.out.println(a); // Throws NullPointerException
 }
Please share your thoughts on this post in the comments section.
Friday, 6 March 2015
SIMD in .NET
Welcome to Logically Proven blog.
This post demonstrates SIMD vector type.
What is SIMD?
SIMD stands for "Single Instruction, Multiple Data". It is a set of processor instructions that operate over vectors instead of scalars. This allows mathematical operations to execute over a set of values in parallel.
In other words, a single instruction which performs multiple operations on the data parallely.
.png)
SIMD is a technology that enables data parallelization at the CPU level.
Difference between Multi-threading and SIMD?
You might be thinking why we need SIMD when we achieve the data parallelization with multi-threading.
While multi-threading is certainly a critical part, it is important to realize that it is still important to optimize the code that runs on a single core.
Multi-threading allows parallelizing work over multiple cores while SIMD allows parallelizing work within a single core.
Hope you got answer to your question.
The next generation JIT compiler RyuJIT for .NET supports SIMD functionality.
Why do I care?
The following statistics will answer this question.
SIMD offers a significant speed-up for certain kind of applications. For example, the performance of rendering Mandelbrot (complex mathematical operations) can be improved a lot by using SIMD.
It improves up to 3 times using SSE2 capable hardware and up to 5 times using AVX (Advanced Vector Extensions) capable hardware.
SSE2 and AVX are extensions to the instruction set architecture for microprocessors from INTEL.
Click on the provided links to know more about these extensions.

Sample Code
Consider you need to increment a set of floating point numbers by a given value.
Normally, you had to write a for loop to perform this operation sequentially as shown below -
SIMD allows adding multiple values simultaneously by using CPU specific instructions. This is often exposed as a vector operation:
Note that there is no single SIMD specification. Rather, each processor has a specific implementation of SIMD. They differ by the number of elements that can be operated on as well as by the set of available operations. The most commonly used implementation of SIMD on Intel/AMD hardware is SSE2.
SIMD at the CPU level
1. There are SIMD-specific CPU registers. They have a fixed size. For SSE2, the size is 128 bits.
2. The processor has SIMD-specific instructions, specific to the operand size. As far as the processor is concerned, a SIMD value is just a bunch of bits. However, a developer wants to treat those bits as a vector of, say, 32-bit integer values. For this purpose, the processor has instructions that are specific to the operation, for example consider the operand type is addition, thus 32-bit integers.
Usage
The SIMD operations are very useful in graphical and gaming applications.
Use when
However, SIMD is applicable to any application type that performs numerical operations on a large set of values; this also includes complex, scientific computing and finance.
How to Install?
3 steps -
Download and install the latest preview of RyuJIT from http://aka.ms/RyuJIT
NuGet package
The SIMD APIs are available via NuGet package - Microsoft.Bcl.Simd
Set Environment Variables
To enable the new JIT and SIMD, we need to set some environment variables. The easiest way to do is creating a batch file that starts your application.
Limitations
SIMD Example
The example contains how to leverage SIMD from C#. Check this link from MSDN for the detailed explanation - SIMD Example from MSDN
Please write your comments if you find anything is incorrect or do you want to share more information about the topic discussed above.
Logically Proven
Learn, Teach, Share
Ref: Thanks to MSDN
This post demonstrates SIMD vector type.
What is SIMD?
SIMD stands for "Single Instruction, Multiple Data". It is a set of processor instructions that operate over vectors instead of scalars. This allows mathematical operations to execute over a set of values in parallel.
In other words, a single instruction which performs multiple operations on the data parallely.
SIMD is a technology that enables data parallelization at the CPU level.
Difference between Multi-threading and SIMD?
You might be thinking why we need SIMD when we achieve the data parallelization with multi-threading.
While multi-threading is certainly a critical part, it is important to realize that it is still important to optimize the code that runs on a single core.
Multi-threading allows parallelizing work over multiple cores while SIMD allows parallelizing work within a single core.
Hope you got answer to your question.
The next generation JIT compiler RyuJIT for .NET supports SIMD functionality.
Why do I care?
The following statistics will answer this question.
SIMD offers a significant speed-up for certain kind of applications. For example, the performance of rendering Mandelbrot (complex mathematical operations) can be improved a lot by using SIMD.
It improves up to 3 times using SSE2 capable hardware and up to 5 times using AVX (Advanced Vector Extensions) capable hardware.
SSE2 and AVX are extensions to the instruction set architecture for microprocessors from INTEL.
Click on the provided links to know more about these extensions.
Sample Code
Consider you need to increment a set of floating point numbers by a given value.
Normally, you had to write a for loop to perform this operation sequentially as shown below -
float[] values = GetValues();
float increment = GetIncrement();

// Perform increment operation as manual loop:
for (int i = 0; i < values.Length; i++)
{
    values[i] += increment;
}
SIMD allows adding multiple values simultaneously by using CPU specific instructions. This is often exposed as a vector operation:
Vector<float> values = GetValues();
Vector<float> increment = GetIncrement();

// Perform addition as a vector operation:
Vector<float> result = values + increment;
Note that there is no single SIMD specification. Rather, each processor has a specific implementation of SIMD. They differ by the number of elements that can be operated on as well as by the set of available operations. The most commonly used implementation of SIMD on Intel/AMD hardware is SSE2.
SIMD at the CPU level
1. There are SIMD-specific CPU registers. They have a fixed size. For SSE2, the size is 128 bits.
2. The processor has SIMD-specific instructions, specific to the operand size. As far as the processor is concerned, a SIMD value is just a bunch of bits. However, a developer wants to treat those bits as a vector of, say, 32-bit integer values. For this purpose, the processor has instructions that are specific to the operation, for example consider the operand type is addition, thus 32-bit integers.
Usage
The SIMD operations are very useful in graphical and gaming applications.
Use when
- The applications are very computation-intensive.
- Most of the data structures are already represented as vectors.
However, SIMD is applicable to any application type that performs numerical operations on a large set of values; this also includes complex, scientific computing and finance.
How to Install?
3 steps -
- Download compiler.
- Set Environment variables.
- Add a reference in your project to NuGet package Microsoft.Bcl.Simd
Download and install the latest preview of RyuJIT from http://aka.ms/RyuJIT
NuGet package
The SIMD APIs are available via NuGet package - Microsoft.Bcl.Simd
Set Environment Variables
To enable the new JIT and SIMD, we need to set some environment variables. The easiest way to do is creating a batch file that starts your application.
@echo off
set COMPLUS_AltJit=*
set COMPLUS_FeatureSIMD=1
start myapp.exe
Limitations
- SIMD is only enabled for 64-bit processes.
- The vector type only supports int, long, float and double.
- Currently SIMD is taking advantage of SSE2 hardware. AVX is not supported.
SIMD Example
The example contains how to leverage SIMD from C#. Check this link from MSDN for the detailed explanation - SIMD Example from MSDN
Please write your comments if you find anything is incorrect or do you want to share more information about the topic discussed above.
Logically Proven
Learn, Teach, Share
Ref: Thanks to MSDN
Thursday, 5 March 2015
ASP.Net vNext - A Completely New Version

This post demonstrates PROS and CONS of the ASP.Net vNext, a completely new version of ASP.Net. There is some super exciting stuff going on in the .NET community right now. I'm going to post a few entries on my favourites.
ASP.Net vNext -
This ASP version is so awesome. It is currently under development. It combines technologies like ASP.NET MVC and Web API into a single programming model and will be cross platform.
The framework will be called ASP.NET 5 when it gets ready.
PROS -
1. It is an open source. that's right. it is on github. Go make a contribution! - Github-vNext
2. It is totally unbound to IIS, so you can host it pretty much anywhere .net can run. Since Mono allows dotnet to run pretty much anywhere, ASP can run pretty much anywhere. like on a Mac in the console, on your Linux server, on your netduino, raspi, your grandma's old 386 in the basement she refuses to throw away.
3. It is highly customizable and extensible with dependency injection as a first class concept so you and add and remove features and functionality as you see fit.
4. Runtime, in memory compilation, with the Roslyn compiler means way faster start-ups. Check this link for more details on the compiler - Roslyn compiler
5. The project system is changing, dramatically so there is a learning curve here, but IMO it is much better in the long run as it promises to ease many of the pain points of the csproj files.
6. The new project system is also likely going to be a blacklisted project system. so you must EXCLUDE files you don't care about rather than INCLUDE all the files you do. This will make merges much cleaner.
7. Everything is based on the best data interchange format ever! json config files* and json project files and json package manifests.
8. An entirely new "environment" or "host" aware configuration system allows you to read config settings from multiple providers like your project-local config files, host-global files, environment variables, databases, web services, etc. you can pretty much just implement your own config provider and read from anywhere.
9. Supports Raspberry Pi which relates to the field of embedded systems.
CONS -
1. Suppose we got to learn how to do it and that is a learning curve but it looks like a not to steep of one.
2. ASP web forms are not supported in vNext (they are too strongly tied to the System.Web). These are my favourites. Land on the github to know your favourites.
Please share your thoughts on this post in the comments section.
Tuesday, 3 March 2015
How to suppress "Save Changes" prompt when the excel workbook is closed - VBA
Welcome to Logically Proven blog.
This post demonstrates how to suppress "Save Changes" prompt when you close the excel workbook using VBA (Visual Basic for Applications).
Note - This code works only when macros are enabled.
Sometimes it is required to suppress "Save Changes" Prompt in your excel application. It will be so annoying every time when you try to close the workbook the prompt appears.

Let get into the details.
When you suppress the prompt, you have the following two choices to decide -
1. Save the changes and Close the workbook
2. Close the workbook without saving the changes
We are achieving this functionality in the Workbook_BeforeClose() event. This event triggers by the excel application when you close the excel workbook.
Save the changes and Close the workbook:
In this code, if open workbooks count is one, we are saving the workbook and quitting the excel application. If open workbooks count is more than one we are saving the currently working excel workbook and closing the workbook. The other excel workbooks remains open.
Close the workbook without saving the changes:
This code quits the excel application if open workbooks count is one. Else it closes only the current working excel workbook without saving the changes.
In this event, you can perform some other tasks before closing your excel application. For example clearing data, setting default values etc.
Please write your comments if you find anything is incorrect or do you want to share more information about the topic discussed above.
Logically Proven
Learn, Teach, Share
This post demonstrates how to suppress "Save Changes" prompt when you close the excel workbook using VBA (Visual Basic for Applications).
Note - This code works only when macros are enabled.
Sometimes it is required to suppress "Save Changes" Prompt in your excel application. It will be so annoying every time when you try to close the workbook the prompt appears.
Let get into the details.
When you suppress the prompt, you have the following two choices to decide -
1. Save the changes and Close the workbook
2. Close the workbook without saving the changes
We are achieving this functionality in the Workbook_BeforeClose() event. This event triggers by the excel application when you close the excel workbook.
Save the changes and Close the workbook:
Private Sub Workbook_BeforeClose(Cancel As Boolean)

    If Application.Workbooks.Count = 1 Then
        Application.DisplayAlerts = False
        ThisWorkbook.Save
        Application.Quit
    Else
        ThisWorkbook.Close savechanges:=True
    End If

End Sub
In this code, if open workbooks count is one, we are saving the workbook and quitting the excel application. If open workbooks count is more than one we are saving the currently working excel workbook and closing the workbook. The other excel workbooks remains open.
Close the workbook without saving the changes:
Private Sub Workbook_BeforeClose(Cancel As Boolean)

    If Application.Workbooks.Count = 1 Then
        Application.DisplayAlerts = False
        Application.Quit
    Else
        ThisWorkbook.Close savechanges:=False
    End If

End Sub
This code quits the excel application if open workbooks count is one. Else it closes only the current working excel workbook without saving the changes.
In this event, you can perform some other tasks before closing your excel application. For example clearing data, setting default values etc.
Please write your comments if you find anything is incorrect or do you want to share more information about the topic discussed above.
Logically Proven
Learn, Teach, Share
Monday, 2 March 2015
Progress window with text updates in Excel - VBA
Welcome to Logically Proven blog.
This post demonstrates how to create a progress window with text updates in Excel using VBA (Visual Basic for Applications).
This post explains how to display the progress window with text updates as shown in the picture below -

Consider the application user interface (UI) is designed as -

This application functionality is user browses a folder and clicks on Import button. On clicking import button, the application processes all the files in a folder. After import, the user clicks on Export button, which exports the worksheet data as a PDF report.
Check this link how to generate a PDF report from an excel workbook or worksheet - Generate PDF
It is very important to show updates or status of the application to the user when the application takes a significant amount of time for code completion to improve user interface.
Now we look into the code how to achieve this functionality.
Step 1: Design the form as shown in the picture.

Select properties of a form (Press F4 or View -> 'Properties Window') : update the Name of a form to frm_Progress and Caption to "Processing input files".
Select properties of a label: Update the Name to "lblProgress". In addition you can add the label text color, background colour, default text and resizing options of a label text in the properties.
Step 2: Add "Import" button event code.
In this application all buttons are of command type.
In an excel application, double-click the Import button to generate an event handler code. The code looks as follows:
Here the progress window displays immediately when the user clicks on Import button. You can change this behaviour by adding some validations or some other work to be done before popping up the progress window.
Step 3: Add the following code in the UserForm_Activate event.
To generate event handler code of a form; double-click on the form (not on label) to generate the UserForm_Activate Code. The code looks like -
Step 4: Add the following code in a sub-routine "Processing".
Then it is the time to add a code in the Processing sub-routine which tells you how to update the progress window.
This sub-routine is performing the task to iterate through each file in a browsed folder and doing some file processing. Here the code is just for your understanding. So here the progress window displays the status of the application with a message saying that which file is processing of total files.
.lblProgress.Caption is to set the label message.
.Repaint is to update the form label message and continues to run the sub-routine.
It is very important to close the progress window in case of error or at the end of the sub-routine. Else the progress window stays on even the application completes the execution of code.
If you want to hide or show the progress window in between use the following code -
You have to follow these 4 steps to show the progress window with text updates.
Following is the sample progress window that displays while the applications runs -

Please write your comments if you find anything is incorrect or do you want to share more information about the topic discussed above.
Logically Proven
Learn, Teach, Share
This post demonstrates how to create a progress window with text updates in Excel using VBA (Visual Basic for Applications).
This post explains how to display the progress window with text updates as shown in the picture below -
Consider the application user interface (UI) is designed as -
This application functionality is user browses a folder and clicks on Import button. On clicking import button, the application processes all the files in a folder. After import, the user clicks on Export button, which exports the worksheet data as a PDF report.
Check this link how to generate a PDF report from an excel workbook or worksheet - Generate PDF
It is very important to show updates or status of the application to the user when the application takes a significant amount of time for code completion to improve user interface.
Now we look into the code how to achieve this functionality.
Step 1: Design the form as shown in the picture.
Select properties of a form (Press F4 or View -> 'Properties Window') : update the Name of a form to frm_Progress and Caption to "Processing input files".
Select properties of a label: Update the Name to "lblProgress". In addition you can add the label text color, background colour, default text and resizing options of a label text in the properties.
Step 2: Add "Import" button event code.
In this application all buttons are of command type.
In an excel application, double-click the Import button to generate an event handler code. The code looks as follows:
Private Sub cmdImport_Click()

    frm_Progress.Show

End Sub
Here the progress window displays immediately when the user clicks on Import button. You can change this behaviour by adding some validations or some other work to be done before popping up the progress window.
Step 3: Add the following code in the UserForm_Activate event.
To generate event handler code of a form; double-click on the form (not on label) to generate the UserForm_Activate Code. The code looks like -
Private Sub UserForm_Activate()

    'DoEvents force the application to trigger the form events
    DoEvents
    'the application calling the following sub-routine
    'change the name of a sub-routine as per your need
    Call Processing

End Sub
Step 4: Add the following code in a sub-routine "Processing".
Then it is the time to add a code in the Processing sub-routine which tells you how to update the progress window.
Sub Processing()

    Dim MyPath As String
    Dim fso As Object
    Dim Files As Object
    Dim File As Object

    'error handler
    On Error GoTo Error_Handler

    'Update the label with a status message
    With frm_Progress
        .lblProgress.Caption = "Processing data" & vbLf & vbLf & "Please wait..."
        .Repaint
    End With

    Set fso = CreateObject("Scripting.FileSystemObject")
    Set Files = fso.GetFolder("C:\Test").Files

    For Each File In Files
        With frm_Progress
            .lblProgress.Caption = "Processing " & intFileCount & " of " & Files.Count & " file(s)" & vbLf & vbLf & File.Name
            .Repaint
        End With

        'Doing some file processing

    End If

ExitRtn:
    'close the form at the end
    Unload frm_Progress
    Set fso = Nothing
    Set Files = Nothing
    Set File = Nothing
    Exit Sub

Error_Handler:
    MsgBox Err.Description
    Resume ExitRtn
End Sub
This sub-routine is performing the task to iterate through each file in a browsed folder and doing some file processing. Here the code is just for your understanding. So here the progress window displays the status of the application with a message saying that which file is processing of total files.
.lblProgress.Caption is to set the label message.
.Repaint is to update the form label message and continues to run the sub-routine.
It is very important to close the progress window in case of error or at the end of the sub-routine. Else the progress window stays on even the application completes the execution of code.
If you want to hide or show the progress window in between use the following code -
    'to hide the progress window
    frm_Progress.Hide
    'to show the progress window
    frm_Progress.Show
You have to follow these 4 steps to show the progress window with text updates.
Following is the sample progress window that displays while the applications runs -
Please write your comments if you find anything is incorrect or do you want to share more information about the topic discussed above.
Logically Proven
Learn, Teach, Share
Friday, 27 February 2015
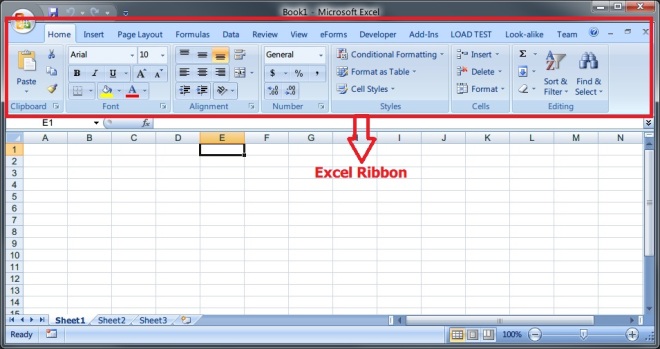
Hide or Show an Excel Ribbon - VBA
This post demonstrates how to hide or show an excel ribbon using VBA (Visual Basic for Applications).
In certain cases it may not required to show an excel ribbon to the user. In such cases, hide the excel ribbon for a better user interface.
1. Hide ribbon when user opens the excel workbook
2. Show ribbon when user deactivates the workbook
3. Hide ribbon when user activates the workbook
4. Show ribbon before exit from the excel workbook
Add the following code in the Workbook_Open event.
Add the following code in the Workbook_Deactivate event.
Add the following code in the Workbook_Activate event.
Add the following code in the Workbook_Close event.
And finally add this sub-routine in a module.
Please share your thoughts on this post in the comments section.

The excel ribbon will be hidden at the application level. This means in all workbooks, the excel remains hidden.So it is important to show the excel ribbon when the workbook is deactivated or before exit from the workbook.
Follow these four steps to handle the excel ribbon -
1. Hide ribbon when user opens the excel workbook
2. Show ribbon when user deactivates the workbook
3. Hide ribbon when user activates the workbook
4. Show ribbon before exit from the excel workbook
Hide ribbon when excel workbook is open -
Add the following code in the Workbook_Open event.
ShowRibbon is the sub-routine which shows/hides the ribbon depending on the argument passed.
False - To hide the ribbon
True - To show the ribbon
Private Sub Workbook_Open()
   ShowRibbon False
End Sub
Show ribbon when workbook is deactivated -
Add the following code in the Workbook_Deactivate event.
Private Sub Workbook_Deactivate()
   ShowRibbon True
End Sub
Hide ribbon when workbook is activated -
Add the following code in the Workbook_Activate event.
Private Sub Workbook_Activate()
   ShowRibbon False
End Sub
Show ribbon before exit the workbook -
Add the following code in the Workbook_Close event.
Private Sub Workbook_BeforeClose(Cancel As Boolean)
   ShowRibbon True
End Sub
ShowRibbon -
'Show/Hide ribbon
Public Sub ShowRibbon( _
    ByVal Visible As Boolean _
)

 #If Not Authoring Then
    If Visible Then
        'show ribbon
        Application.ExecuteExcel4Macro "SHOW.TOOLBAR(""Ribbon"",True)"
    Else
        'hide ribbon
        Application.ExecuteExcel4Macro "SHOW.TOOLBAR(""Ribbon"",False)"
    End If
 #End If

End Sub
Please share your thoughts on this post in the comments section.
Thursday, 26 February 2015
Import CSV or delimited text file in Excel - VBA
This post demonstrates how to import CSV or any delimited text file in Excel using VBA code.
But there are two limitations with the below example. The first limitation is code works with 64000 records in Excel 2003 and 1048576 records in the later versions. If the file is larger than this, modify the code to split the imported data across multiple worksheets. The second limitation is code works if the text file is in ANSI character representation which is default when you save a text file on WINDOWS.

Please share your thoughts on this post in the comments section.
Each line in the text file is written into one row in a worksheet. The imported data is separated into columns in a worksheet depending on the delimited character that you specify.
But there are two limitations with the below example. The first limitation is code works with 64000 records in Excel 2003 and 1048576 records in the later versions. If the file is larger than this, modify the code to split the imported data across multiple worksheets. The second limitation is code works if the text file is in ANSI character representation which is default when you save a text file on WINDOWS.
Sample Text File -
4 Rows
3 Columns
Delimited by ',' (Comma)
After Import -
When the import button is clicked, the text appears in a worksheet as shown in the picture above.
Import Button Code -
Sub ImportText()
    ImportFile FName:="D:\data.txt", Sep:=","
End Sub
ImportFile is the sub-routine which imports the data. Change the sep:= as per your requirement. In this example comma is the separator.
ImportFile Code -
Public Sub ImportFile(FName As String, Sep As String)

Dim RowNdx As Long
Dim ColNdx As Integer
Dim TempVal As Variant
Dim WholeLine As String
Dim Pos As Integer
Dim NextPos As Integer
Dim SaveColNdx As Integer

'disable screen updates
Application.ScreenUpdating = False
'error handling
On Error GoTo EndMacro

'Importing data starts from the selected cell in a worksheet
SaveColNdx = ActiveCell.Column
RowNdx = ActiveCell.Row

'open the file in read mode
Open FName For Input Access Read As #1

'Read the file until End of Line
While Not EOF(1)
    'read line by line
    Line Input #1, WholeLine
    If Right(WholeLine, 1) <> Sep Then
        WholeLine = WholeLine & Sep
    End If
    ColNdx = SaveColNdx
    Pos = 1
    NextPos = InStr(Pos, WholeLine, Sep)
    'finding each column data
    While NextPos >= 1
        TempVal = Mid(WholeLine, Pos, NextPos - Pos)
        Cells(RowNdx, ColNdx).Value = TempVal
        Pos = NextPos + 1
        ColNdx = ColNdx + 1
        NextPos = InStr(Pos, WholeLine, Sep)
    Wend
    RowNdx = RowNdx + 1
Wend

Close #1
Exit Sub
EndMacro:
Application.ScreenUpdating = True
MsgBox Err.Description, vbOKOnly, "Error"
Close #1

End Sub
Summary -
This way you can import any delimited text file. Make sure that the text file is not exceeding the maximum number of rows of excel worksheet.
Please share your thoughts on this post in the comments section.
Subscribe to:
Posts (Atom)


